
Launching Learning Julia
I am launching this blog to document and share my experience learning the Julia programming language. My learning style is to learn by doing - I’m sure the things I do at first will be wrong, against code style, and inefficient. But that is the best way to learn: you try something out, realize it doesn’t work, and end up learning something.
My background is in computer vision and image processing, so the challenges I will set for myself will be based around images. Eventually, I hope to move on to neural networks, data science, and other machine learning. But you have to start somewhere, and start small.
This blog is powered by Jekyll, and the source code is fully open-source, hosted on my Github account, so you can follow along in source code as well.
So let’s dive right in!
Installing Julia, using Notebooks
First I had to install Julia to my local computer. I am doing my development on an Ubuntu 16.04 system with a Kubuntu skin - if I include screenshots, they will be from this computer. And any operating-system-specific information will be about Linux.
First, I went to the official download page and downloaded the 64-bit tar file of Julia 0.5.0 and untar it:
tar -xvf ~/Downloads/julia-0.5.0-linux-x86_64.tar.gzI also added the location of the binary julia to my PATH, so when I run julia from the command line, I start the Julia REPL.
export PATH=$PATH:$HOME/Documents/software/julia-3c9d75391c/bin/Now to install the IJulia notebooks, first start the REPL, and install the package:
julia> Pkg.add("IJulia")The concept of adding a package and installing a package is one and the same - if your program needs a package, just add it. If you don’t have this package, it will be downloaded and compiled. If you have an outdated version of the package, you will get a message that tells you exactly how to update:
INFO: Nothing to be done
INFO: METADATA is out-of-date — you may not have the latest version of IJulia
INFO: Use `Pkg.update()` to get the latest versions of your packages

julia> Pkg.update()
And once that finishes, start the IJulia notebook from the local directory:
julia> using IJulia();
julia> notebook(dir=".");
I had the problem of “authentication” with my IJulia notebooks, shown in this screenshot:
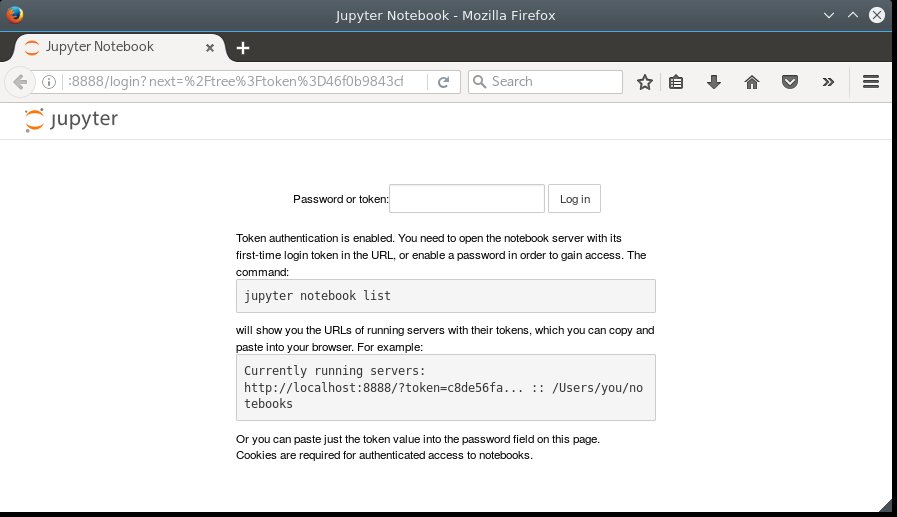
I got the token by running jupyter notebook list in my terminal and copying the token into the password box.
I will do most of my learning using IJulia notebooks - I am already familiar with Jupyter notebooks. They are fantastic for getting immediate feedback (and plotting!) from a REPL. If and when it comes time to make a new package, I will learn how that system works as well. I will start with baby steps, and go from there.
Posting notebooks on this blog
The source code for all the notebooks (the .ipynb files) are posted at the Github repository in their original form, so you can download and look at those as well.
The awesome thing about IJulia notebooks is that you can export them into .html format to embed into a blog. Once finished with the notebook and ready for export, just run nbconvert:
jupyter nbconvert --execute --allow-errors \
	--output-dir=../_includes/notebooks/ \
	--to=html --template=basic.tpl NOTEBOOK_NAME.ipynb
This will do a few things:
- Execute the notebook (and continue the process even if a cell contains an error)
- Output to HTML and save to the
_includes/notebooks/folder with no formatting (using the example code above, it will be saved toNOTEBOOK_NAME.html)
Next, create the post with the correct front-matter and any text outside of what the notebook HTML will generate. Lastly, simply include the notebook, like so:
include _notebooks/NOTEBOOK_NAME.htmlNotebook Rendering Aside
There is one annoying post-processing step (which I will eventually write a post-processor for in Jupyter, but for now am content doing it manually). when Julia renders inline SVGs, it includes an HTML line DOCTYPE, which does not get rendered properly by Jinja templates on the Jekyll include. So I manually delete the DOCTYPE line in the NOTEBOOK_NAME.html rendering, and the SVGs get rendered properly.
A second annoyance is that I had to create a custom nbconvert template file based off of the basic.tpl file provided. I wanted to make sure that all the output cells in my notebook were annotated with the Out[] tag, and the easiest way to do that was to modify the template a little bit.
I hope you enjoy following me on my journey through Julia. I know I will enjoy sharing it with you.